Self-Activation
tip
- This feature's main purpose is to start the self-activation environment after rebooting the phone without a PC, so the agent IPA works normally
- This feature only works on WiFi networks; mobile networks do not work
- We recommend the new standalone activator client (Control Center → Standalone Activator → New Interface) for a clearer workflow — see → Standalone Activator Tutorial
Self-activation video tutorial
Prerequisites
- Open the standalone activator: Control Center toolbar → Standalone Activator → choose New Interface (recommended) or Classic Interface
- If you prefer not to use the standalone activator, you can also use the latest standalone control center screen mirroring system to prepare the self-activation environment
- VPN preparation
- If the signed mobileprovision profile includes
[com.apple.developer.networking.networkextension]and[com.apple.developer.networking.vpn.api], you can skip downloading the LocalDevVpn app - See below
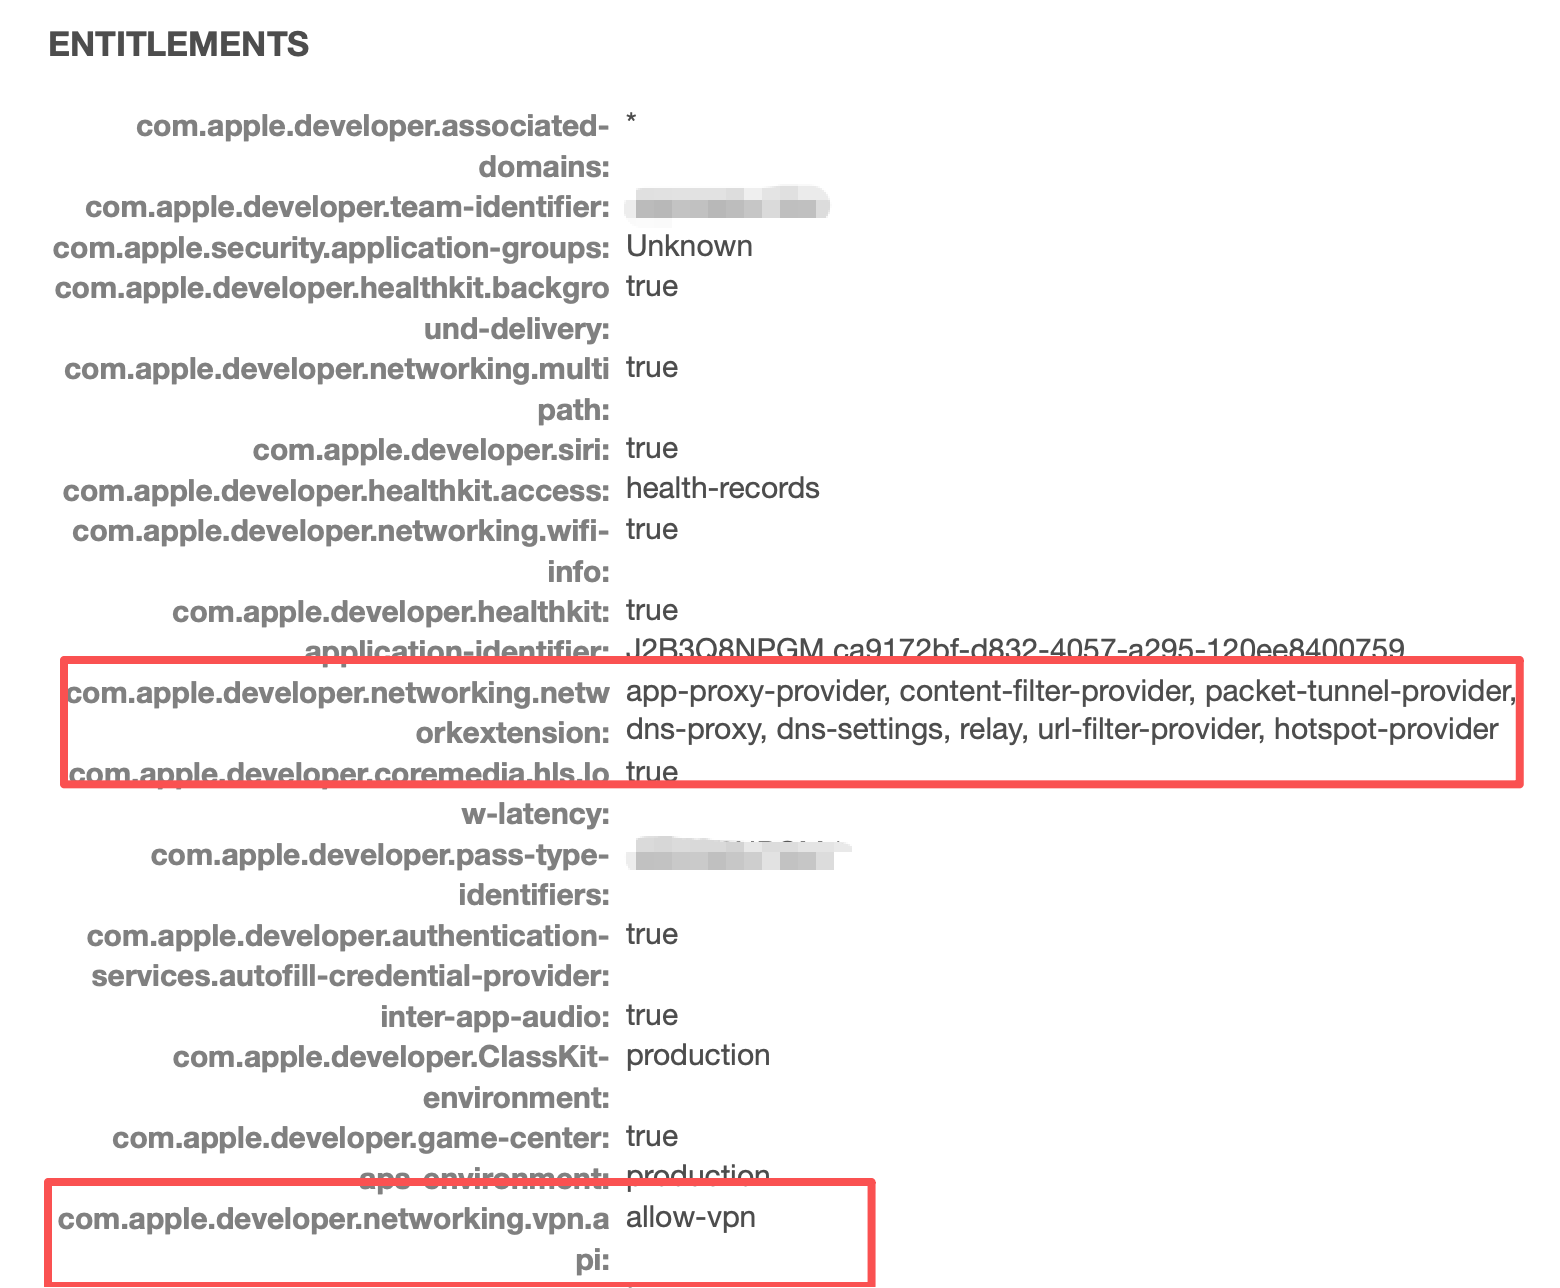
- If the signing profile lacks these entitlements, download LocalDevVpn from the App Store with a US Apple ID. US accounts can be bought on Xianyu or search online for registration guides
- Main app is open, licensed, and initialized! (See activator tutorial for initialization). User info in main app Settings must have data
- For packaged main apps, go to main app Settings → bottom section Other Settings → enable debug service. Debug builds enable debug service automatically
- Developer image configured — see Configure Developer Image
One-Click Environment Setup
- Connect the phone via USB. The first time generating a pairing file, the phone needs a passcode; otherwise it may fail. You can remove the passcode afterward
- Open the standalone activator (Control Center → Standalone Activator → New Interface). Connected phones are listed with connection type USB and Success in the Image column
- You can also open the activator page in a browser (classic interface)
- With main app debug service enabled, click Batch Self-Activation → Scan Device IP Addresses. Results appear in the Debug Address column
- For packaged apps, enable debug service under app Settings → Other Settings, otherwise scanning may fail. Initialization and licensing are required
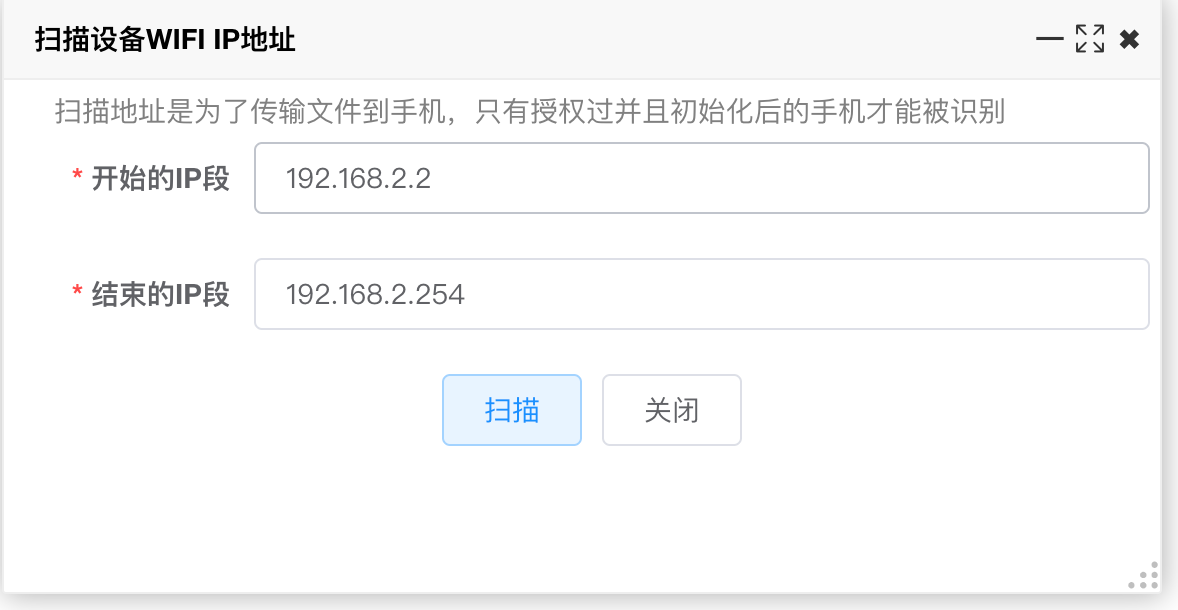
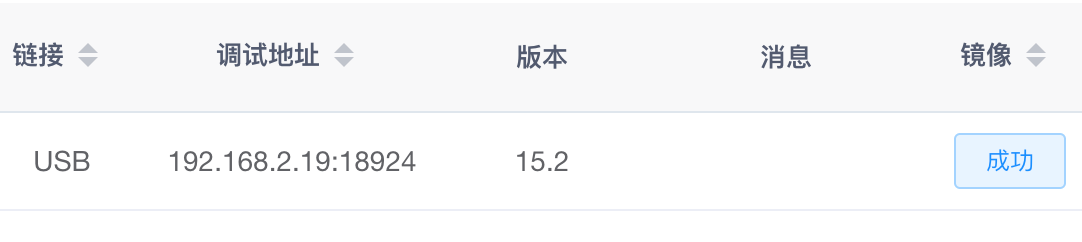
- Click Batch Self-Activation → One-Click Complete Self-Activation Environment. The system auto-generates pairing certificates and pushes required files to the phone
- This may trigger a trust dialog on the phone — tap Trust if shown. Retry if it fails
- Developer image must be flashed successfully before this step
- After setup, click Batch Self-Activation → Self-Activation Test (internal or external VPN). External VPN opens LocalDevVpn; results appear on the page
Other Features
- Scan device IP — scan upload file addresses
- Batch generate pairing files — generate trust pairing files for the phone; must push to phone before use
- Batch push pairing files — push device pairing files to the phone
- Batch push image files — push image files to the phone
- Self-activation test (external LocalDevVpn) — test self-activation with external VPN app
- Self-activation test (internal VPN) — test self-activation with internal VPN
- Try the above features as needed
Main App Self-Activation Settings
- Main app Settings also supports self-activation testing and VPN operations
FAQ
- Push pairing file does not exist — click Batch Self-Activation → Batch Generate Pairing Files to regenerate
- Push image file says file not found — configure image files and flash successfully first. See Configure Developer Image
- Self-activation says environment not ready
- WiFi debug must be on — use activator WiFi Debug → Enable WiFi Debug
- Pairing certificate wrong or expired — generate and upload pairing certificate via Batch Self-Activation → Batch Generate Pairing Files
- VPN not working — first VPN open may prompt on phone; allow it
- Force-quit main app or reboot phone and retry self-activation
- Phone must be on WiFi; mobile network does not work
- Self-activation succeeded but agent IPA won't open
- Likely an agent IPA issue; try flashing image from PC and test again
- Cannot generate pairing file
- Phone passcode is required to generate pairing files
- Debug main app IPA won't install after signing
- Package a debug build from IDEA; it auto-updates bundleId-related values, then sign and install again